After seeing Jeff Geerling compare his home-made storage server with a commercial one I thought I would expand on my OpenZFS post. You wouldn't mine Chia on a Pi but you can use it as a cheap storage server after creating your storage plots.
Parts
1 x Raspberry Pi4 and case
1 x Rpi power supply
1 x Micro SD card
1 x Powered USB 3.0 hub
5 x External HDD (powered)
2 x Power boards for all the power adapters
I'm not sponsored by anyone so I had to pay for all the parts myself. The power boards are old ones I had left over (I swap out old power boards every few years as the cheap ones tend to fail). The Pi4 was reallocated from number crunching duties. I picked 10TB drives based on the price per GB. If I wanted lots of disk space and price wasn't an issue I would have used 16TB drives. Its best to keep the drives the same size, otherwise you have to use multiple pools.
I am using a 4GB Pi4. The USB hub is a TP-Link UH700 which gives 7 ports and is rated for USB 3.0 speeds. Most USB hubs larger than 4 ports seem to come with a power adapter. The disks are Seagate Expansion 10TB drives.

I had to use two 6 outlet power boards because the spacing between the sockets means I can't plug the adapters in next to each other. Wiring gets messy. I would recommend zip-tying the cables to keep it tidy.

I assume that you have plugged everything in, powered it up and installed OpenZFS on your Raspberry Pi. See my earlier blog post for getting OpenZFS installed Here
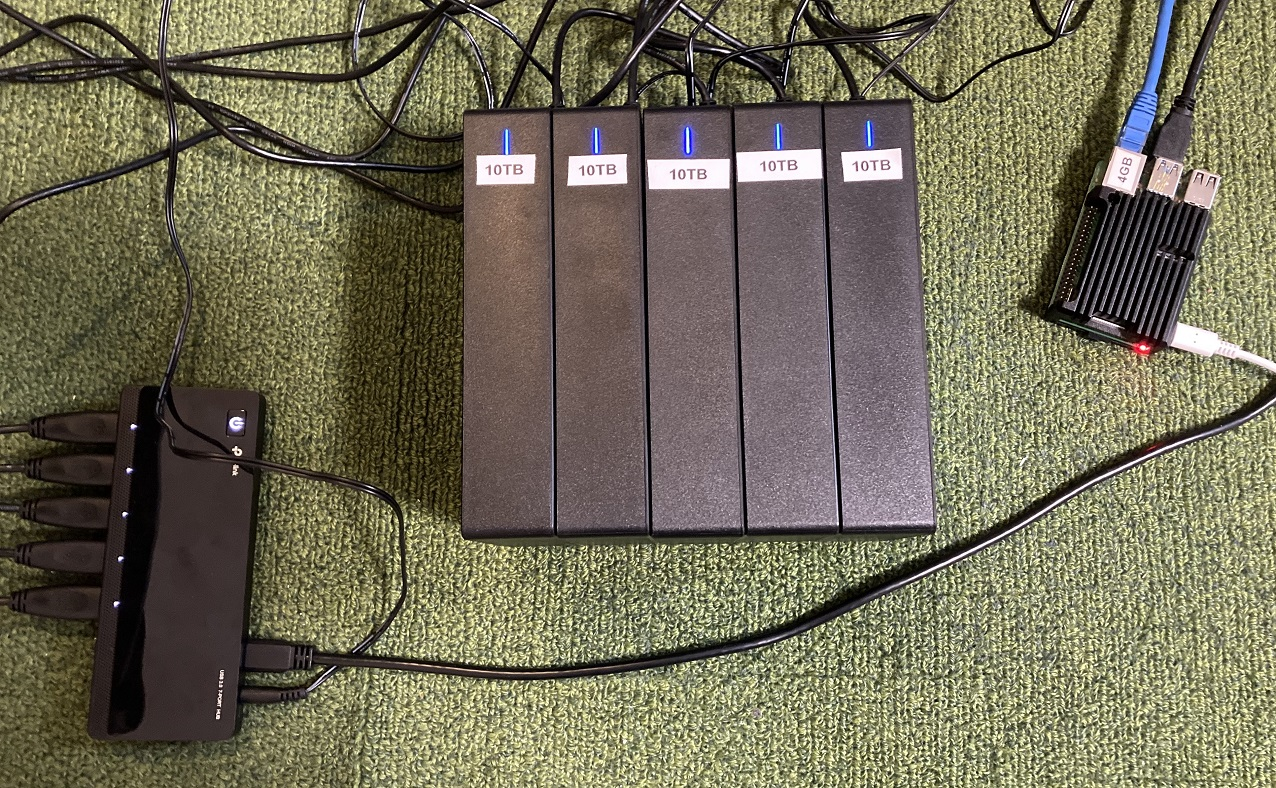
Lets see what drives are attached. The lsblk (list block device) command will show them:
lsblk
NAME MAJ:MIN RM SIZE RO TYPE MOUNTPOINT
sda 8:0 0 9.1T 0 disk
|-sda1 8:1 0 9.1T 0 part
`-sda9 8:9 0 8M 0 part
sdb 8:16 0 9.1T 0 disk
|-sdb1 8:17 0 9.1T 0 part
`-sdb9 8:25 0 8M 0 part
sdc 8:32 0 9.1T 0 disk
|-sdc1 8:33 0 9.1T 0 part
`-sdc9 8:41 0 8M 0 part
sdd 8:48 0 9.1T 0 disk
|-sdd1 8:49 0 9.1T 0 part
`-sdd9 8:57 0 8M 0 part
sde 8:64 0 9.1T 0 disk
|-sde1 8:65 0 9.1T 0 part
`-sde9 8:73 0 8M 0 part
mmcblk0 179:0 0 14.9G 0 disk
|-mmcblk0p1 179:1 0 256M 0 part /boot
`-mmcblk0p2 179:2 0 14.6G 0 part /
This
shows I have 5 disks called sda through sde. Each disk is 9.1TB in
capacity and has two partitions (sda1 and sda9). The mmcblk0 device is
the micro SD card which the Pi is booting off.
Create a ZFS pool
Before you do this command make sure that there isn't any data you want to keep on the drives.
sudo zfs create pool1 raidz /dev/sda /dev/sdb /dev/sdc /dev/sdd /dev/sde -f
This
says create a pool (of disks) called "pool1" its a raidz and we're
using disks sda through sde. Raidz allows for a single disk failure. That
is it can rebuild the missing information from data stored across the
other 4 disks. Of course this means we lose space to allow for this data
redundancy.
Pool attributes
To
get more usable space we can turn compression on for our pool. Turning
compression on means we try to compress the data before storing it on
disk, however it requires some CPU time to do this.
You may have files that don't compress well such as zip files in which case there is no point turning compression on. I don't mine Chia so can't comment on storage plots being compressible or not.
The command to turn on zstd compression is:
sudo zfs set compression=zstd pool1
Note that you need OpenZFS 2 to get zstd compression. If running an older version you can use lz4 compression.
We
can save some disk activity by not updating the atime attribute, that
is the last time a file was accessed. The command to do this is:
sudo zfs set atime=off pool1
To check our pool the command is:
zpool status
pool: pool1
state: ONLINE
config:
NAME STATE READ WRITE CKSUM
pool1 ONLINE 0 0 0
raidz1-0 ONLINE 0 0 0
sda ONLINE 0 0 0
sdb ONLINE 0 0 0
sdc ONLINE 0 0 0
sdd ONLINE 0 0 0
sde ONLINE 0 0 0
errors: No known data errors
Check disk space
Lets see how much space we have after creating our pool. The command would be:
df -h
Filesystem Size Used Avail Use% Mounted on
/dev/root 15G 1.5G 13G 11% /
devtmpfs 1.8G 0 1.8G 0% /dev
tmpfs 1.9G 0 1.9G 0% /dev/shm
tmpfs 1.9G 8.6M 1.9G 1% /run
tmpfs 5.0M 4.0K 5.0M 1% /run/lock
tmpfs 1.9G 0 1.9G 0% /sys/fs/cgroup
/dev/mmcblk0p1 253M 30M 223M 12% /boot
tmpfs 385M 0 385M 0% /run/user/1000
pool1 36T 256K 36T 1% /pool1
You
can see pool1 at the bottom and we have 36TB of available disk space
after allowing for data redundancy. The theoretical disk capacity is
45.5TB (5 x 9.1TB).
It could be much larger by:
- Use more drives. I only have 5 drives plugged in but the USB hub can handle up to 7.
- Use a second hub with another 7 drives.
- Use larger disks. The expansion drives are available in sizes up to 16TB currently.
If
you are going to have one of these running 24/7 I would recommend you
keep a spare drive (or two) for when one fails. Being a spinning disk
its just a matter of when, not if, a drive will fail. A raid array is
not a backup so keep a backup. A UPS would be a good idea as well.
After
powering off the Pi and turning it on again the disk pool disappeared. A
simple reboot fixed that. I believe this is caused by the drive spin up
time. You can configure a boot delay for the Pi which should give the
drives enough time to spin up.
This setup should be able to hold approximately 363 Chia storage plots without compression.
Pricing
The pricing below is in US dollars.
1 x Pi4 4GB ($68)
1 x Pi4 case ($13)
1 x Pi4 power supply ($15)
1 x 16GB Micro SD card ($17)
1 x USB hub ($65)
5 x 10TB external drives ($215 each)
2 x Power strip ($13 each)
Total = $1,279 (USD)
Some parts (eg the Pi4) can be bought 2nd hand or found cheaper. As you can see the most expensive parts are the external hard disks. I've rounded up to the nearest dollar. Pricing taken from amazon on the 9th of May 2021.
A word of warning
SMR (Shingled Magnetic Recording) drives are not suitable for use in a RAID array as described above. They are sometimes called Archive Disks.
I watched a video where the guy bought a bunch of external hard disks, because they were cheaper than internal ones. He then removed them from the case, a process called shucking. When he looked up the drive specs it turned out half of them were SMR drives. There was no warning on the packaging.
